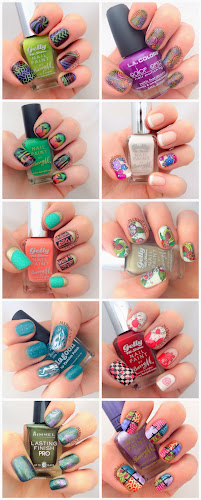
You might recognise the first photo from the finale of the 31 day challenge. It was pure fate that these could be adapted to fit into the MoYou 10k challenge on instagram.
I decided that I would play along and post an NOTD each day I had time and the plates to pull off a mani. So far we've had:
1. Art
2. Nature
3. Animal Print
4. Fantasy
5. Shadows
6. London
7. Red
You'll see I skipped London, as I didn't have anything I could use without being a bit desperate...... I really want the nails to do the talking, otherwise there's no point.
Ok, let's see if I can get all the details down for these 6.
Day 1 - Art
As I mentioned previously, this is a recycled mani from the last challenge I did. All the purples I used are listed in the link.
I felt the mosaic was pretty artistic, so I added some textured stamping with OPI Liquid Sand - Honey Ryder.
Easy peasy, simples! Well the stamping bit was, and that was day 1 out of the way.
Day 2 - Nature
I took advantage of a rare sunny day, and put my holo top coat on. What I forgot was, how difficult holographic polishes were to photograph.
I used Rimmel : Mary Mary Quite Contrary topped with Girly Bits : Hocus Pocus. I then stamped using China Glaze : Astro Hot and MoYou : Mother Nature 01 for the background swirls. Then using the same plate along with Pro 05, and Barry M : Vivid Purple, the butterflies went on top.
Day 3 - Animal Print
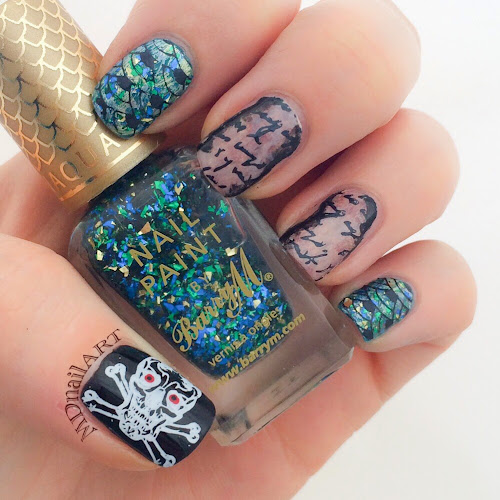
I've done my fair share of leopard print and stripes, so I went for the reptile look this time around. I began with a base of Rimmel : Black To Go, and used MoYou : Pro 05 for the scales. What you can;t see in the photo is the multi tone effect by using 3 polishes to stamp with - Revlon : Rich, Barry M : Copper and Collection : Deadly.
I felt that the pattern was still a bit plain and dark, so I got out the acrylic paints to add some...... I don't know what they are.... Dragon claws? Anyway, I think it lifted the design a bit and gave it quite a mythological feel.
Day 4 - Fantasy
While everyone else was cracking out the fairies and unicorns, I took the opportunity to try out the burned paper effect with my pirate nails. It was far easier than I expected, and most certainly my favourite part of this one.
Unfortunately, I didn't keep a log, or write up a tutorial (as was expected - you know who you are), but I will do one in the near future on a full set of nails.
Day 5 - Shadows
Or silhouettes, to be exact. Yes there is a difference!
Due to my previous lack of purples, I had never done a purple gradient, so this chalenge seemed like a good time to do one. It was so pretty on its own! I almost felt like I had ruined it by stamping on it. The glitter was a nice touch, as stars, before putting on my stamps. The polishes I used were :
Rimmel : Ultra Violet & Hot Black To Go
Barry M : Plum & Diamond Glitter
Konad : Black Pearl
MoYou : Pro 7 & 10 and Mother Nature 01
Day 7 - Red
Don't you hate photos that show up the imperfections! Anyhoo, I thought some lovely tulips were in order, as they are still in full bloom here, and it was a bit different from the usual red roses. This was my first ever go at negative space nails on this scale..... and out of all the nails I have seen, ever, I have never seen them done with stamps. Voila!
Super easy, I used MoYou : Pro XL 14 to stamp the tulips onto my clear base coat, with Konad : Black Pearl, and coloured them in using Barry M : Blood Orange. I then used the darker Rimmel : Red Obsession to paint on a block of colour, over the stamps, and finished with a stripe of acrylic black. On clean up, my red was bleeding all over the place and I just couldn't get it off. This should be a lesson to me, "be very careful with red"!
I can't help but feel that I have been neglecting my blog, maybe that's why this turned out a bit long.... yeah, sorry for that. If there are any requests, questions or suggestions, leave me a note or drop me an e-mail, I am always happy to hear what you think, good or bad.


